
You can apply OCIO configurations directly within the Viewport by adjusting the Viewport View Modes and you can apply OCIO configurations to Play in Editor Mode by creating and configuring a Create In-Game OpenColorIO Display Extension Blueprint node.
This page shows you how to apply your OpenColorIO Configuration Asset to the Viewport and to your project in Play in Editor mode.
Prerequisites
You must set up the following in your project to complete the sections below:
- An OpenColorIO Configuration Asset. Refer to the OpenColorIO Quick Start for steps on creating this Asset.
Convert the Level Viewport's Colors
Follow these steps to apply color conversion to the Level Viewport.
-
In the Viewport, click the View Mode button to open its dropdown menu. Choose OCIO Display to open the Display Configuration settings.

-
In the Display Configuration settings, choose Select an OCIO Asset and select your OCIO Configuration Asset to add it to the Viewport view settings.

-
The following two settings are the source and destination of the color transform. In this example, the source is Utility - Linear - sRGB, and the destination is Output - sRGB Monitor.

-
Click Enable Display to apply the OCIO color transformation to the Viewport.

-
When you enable these settings, the Viewport disables Tone Curve and inserts color conversion into the post processing stage of rendering. It does this right after UE applies the Tone Map but before everything else.
The following image shows how the viewport's color is changed by the OpenColorIO configuration.


OpenColorIO disabled / enabled in Viewport View Modes.
Convert Colors in the In-Game Viewport
To convert colors in the in-game viewport, you must add a Create In-Game OpenColorIO Display Extension Blueprint Node to your Camera Actor's Blueprint class, and associate your OCIO configuration with it.
Steps
-
Open your Camera Actors's Blueprint Class or create a new Camera Component Blueprint Class if you do not already have one and attach it to your Camera.
-
Create a new OpenColor IODIsplay Configuration variable by clicking and dragging from the In Display Configuration pin, or by creating a new variable in the My Blueprint tab.

-
Edit this variable in the Details panel by adding your OCIO Configuration Asset and adjusting the other settings to match your desired color configuration.
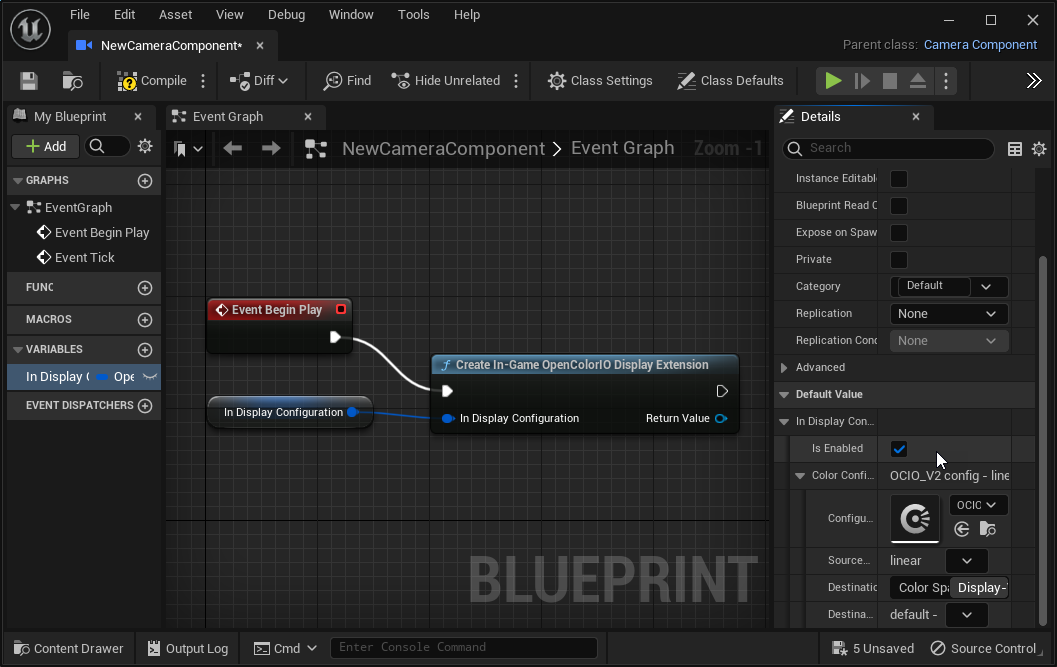
-
Create a new Create In-Game OpenColorIO Display Extension node and attach it to the EventBeginPlay node and your OCIO configuration variable as shown in the screenshot below.
-
Compile and Save your Blueprint.
-
From the Level Editor Viewport, click Play to open your project in Play in Editor mode to test your Blueprint.