
You can use Animation Montages (Montages) to combine several Animation Sequences into a single asset and control playback with Blueprints. You can also use Animation Montages to replicate Root Motion animation in network games.

In addition to building animations with multiple sequences, you can divide montages into Montage Sections, which can be dynamically played back in any order through logic at runtime. You can control the transitions between Montage Sections in the Montage Sections Panel or you can set up more dynamic transition behaviors between Sections by using Blueprints.

For more information about using Animation Montages in Blueprints, see Editing and Using Animation Montages in Blueprints.
Within animation Montages, Sequences are organized into Slot Groups and Slots. Several sequences can be stored in a single Slot to produce animations and additional tracks can be created using different Slots.
By default Sequences that occupy the same Slot and reside in the same Slot Group will override playback of any other sequence when triggered.
See the Slots and Slots Groups section below for more information on Slots.
Creating a Montage
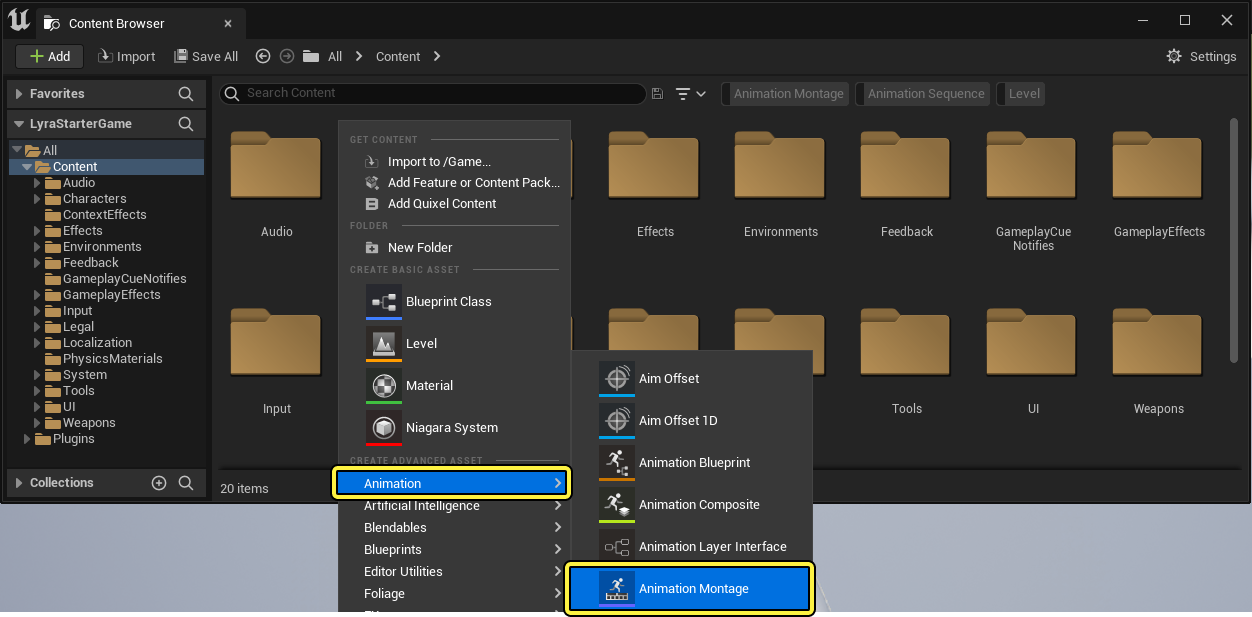
To create a montage, right-click within the content browser then navigate to Animation > Animation Montage. Next, select which Skeleton you want to animate using a montage.
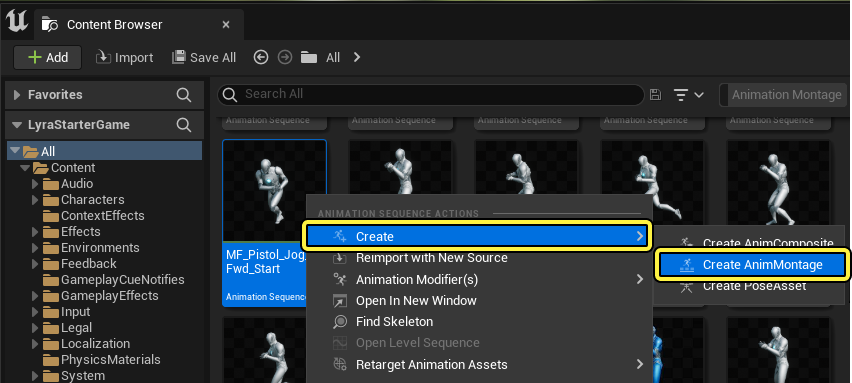
You can also create a Montage from an existing Animation Sequence by Right-Clicking the Sequence in the Content Browser and selecting Create > Create AnimMontage.
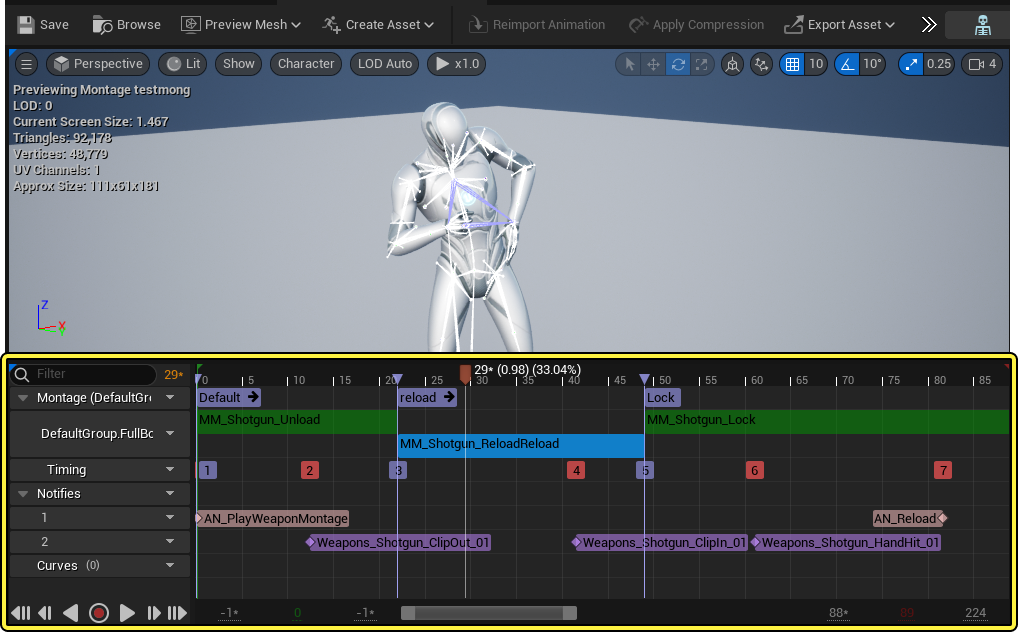
After creating an Animation Montage and opening the asset, the Animation Sequence Editor opens and populates the Timeline with an Animation Montage workspace.
Timeline
The Timeline, like other editor timelines in Unreal Engine, is organized into tracks. These tracks contain information that dictates the behavior of the animation playback and are organized into playback frames.
Sections
Within the Montage track you can access any Montage Sections present in your Animation Montage.
Indicated by their assigned name and a purple header, you can add, delete and move these sections to match the corresponding sequences or sections of sequences for gameplay purposes.
To create a Montage Section Right-Click within the top track, select Create New Section, and enter a name for this Montage Section. You can move and place the Montage Section header by clicking and dragging the header or the line in the timeline.

After creating a Montage Section it appears in the Montage Sections Panel.
To remove a Section, Right-Click the Section header and select Delete Montage Section.
Montage Track
Under the Montage Track header, you can add and manage Animation Sequence tracks, organize tracks by Slot Groups or Slots, and see Timing indicators for Notifies.

You can switch the Sequence Track you are previewing in the Editor by opening the drop-down menu on the desired track. Then, toggle Preview Slot under the Other Options heading.
Slots and Slot Groups
Within Animation Montages, Animation sequences are organized and played in Slots. A Slot occupies a mesh or part of a mesh, and when an animation is placed into the Slot from the animation Montage it can then be played on the Animation Blueprint in that Slot. A Slot track is a succession of sequences that can hold any number of Animation Sequences. By using Montage Sections these sequences can be used in any order dictated by gameplay logic or player input.
You should not overlap animations as Sequences will interfere with one another if they are played at the same time on the same Slot.
To play Sequences on different parts of your Character, animations can be divided into Slot Groups. These Slot Groups can be set up to play on separate parts of your character using the Anim Graph. For example you can use an upper body Slot and a lower body slot, to play separate animations on the upper body and lower body at the same time.
To change or add Slots to the Montage, click the Slot dropdown menu on the Slot track to view the following commands:

| Name | Description |
|---|---|
| Slot name | Exposes a menu where you can change the current Slot. If this is the topmost Slot track, then selecting a Slot that is part of a different Slot Group will change the Montage's Slot Group. |
| New Slot | Adds a new Slot Track using a pre-existing Slot. |
| Delete Slot | Deletes the Slot. |
| Duplicate Slot | Duplicates the Slot track and its contents into a new Slot track. |
| Preview Slot | If you have more than one Slot track, enabling this will cause the contents of this Slot to preview in the Viewport. |
| Slot Manager | Opens the Slot Manager panel. |
For the best results when using multiple slots, you should ensure that the timing of animations involved from end-to-end is the same length.
For more information on Slots and Slot Groups, see the Slots documentation.
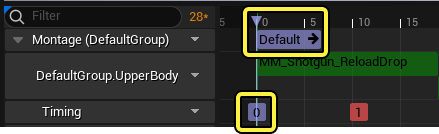
Timing
The Timing track displays indicators from the Montage and Notifies sections to help with the timing of elements.
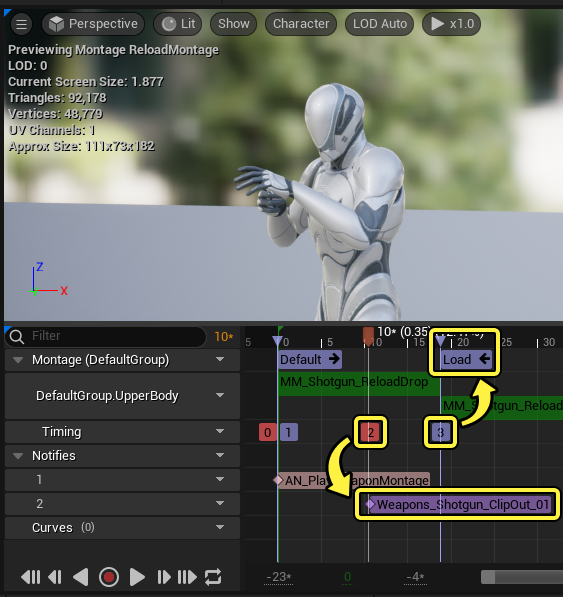
Each node in the track is given a number denoting the trigger order of that object within the montage, and is color coded by reference type, purple for sections, red for Notifies.
Clicking the dropdown arrow on the Timing track presents you with options for showing and hiding the present reference types.
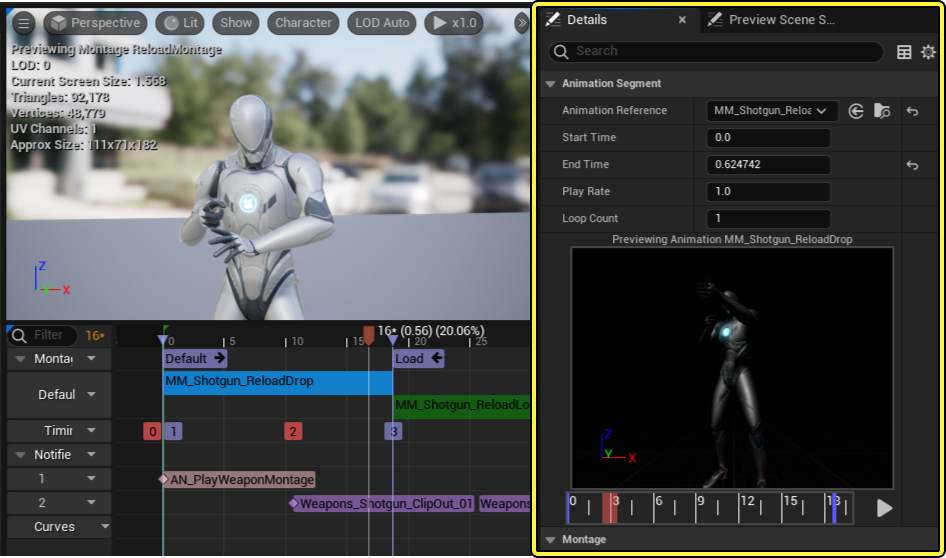
Details Panel
Within the details panel, you can edit and manage properties of the assets contained in your Animation Montage such as Sequences, Notifies, and Montage Sections.
For more information about using the details panel with specific Montage elements see Editing and Using Animation Montages
Montage Sections Panel
In the montage sections panel you can establish the default playback order of your Montage Sections.

To establish a playback order, first select the Clear option, which unlinks any currently selected section behavior, leaving any present sections unlinked.
Then, click the white box to the right of the section you want to edit to select the next Section to be played when triggered. To preview a Sections playback order: begin the animation playback, then click the preview button next to the Section Sequence you wish to preview.
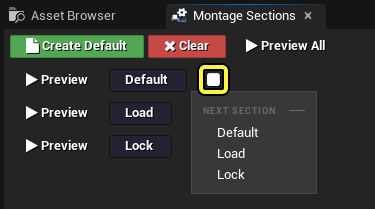
Preview All plays preview of all sections in the order they appear within the Timeline.
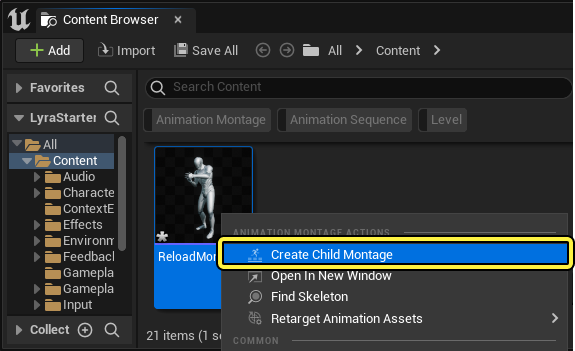
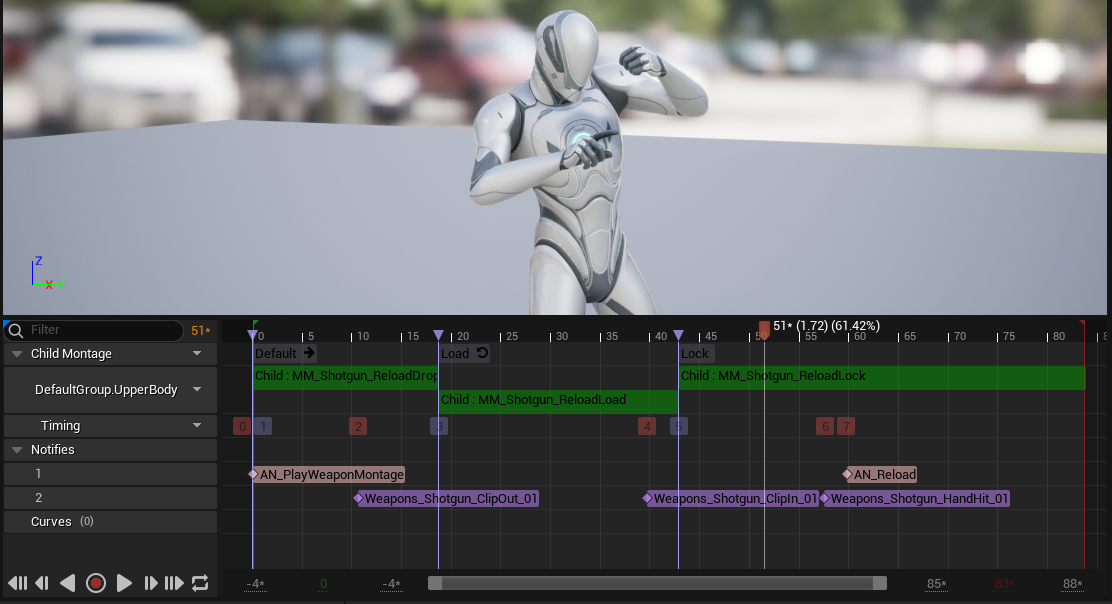
Child Montages
You can use Child Montages to create variants of Montages that inherit all the Parent Montage properties. You can then edit the Child Montage to fit specific needs without altering an established gameplay system or behavior.
To create a Child Animation Montage, right-click on a Montage in the Content Browser and select Create Child Montage.
The new Child Montage is created with the same name as the original asset, with "_Child" added to the end.
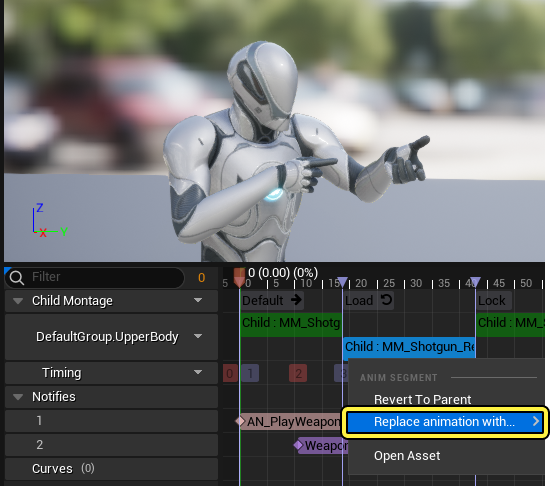
When opening a Child Montage, all elements within the montage are set to read only.
You can right-click the Child Montage Segment in the Slot Track and override it with a new animation.
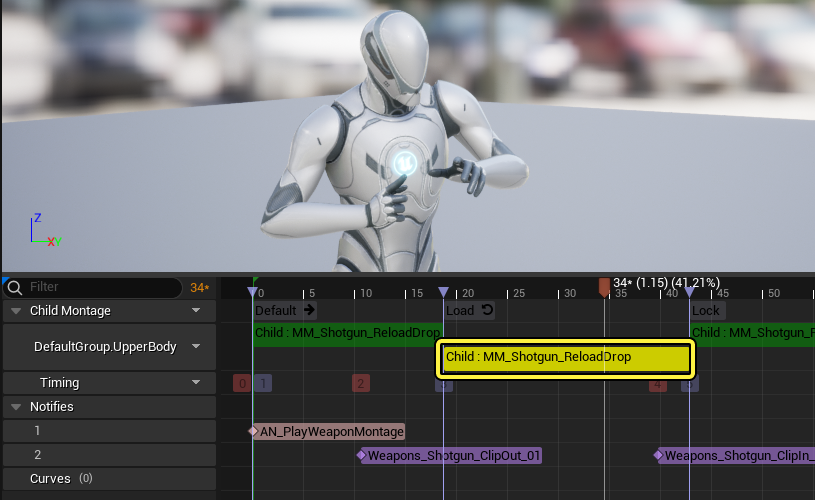
In the Slot Track, you can substitute any animation for any other, even if they are of different lengths. Unreal Engine automatically adjusts the play rate, start time, and end time of the replacement animation so that it uses the same portion and runs at the same time as the original. Animations that have not been changed from the parent are shown in green, and animations that have been overridden are shown in yellow.
Child montages cannot be used as parents for other child montages.
Network Games
When working on a project intended to be played over a network connection you can use Animation Montages to replicate Root Motion in network games. The replication process occurs by default but you first need to replicate the PlayMontage Node manually with a RPC (Remote Procedure Call).
Only the replication and correction of the root motion are carried over when using a Play Montage node in a RPC.
For more information on Network Projects, see the Network Multiplayer documentation.